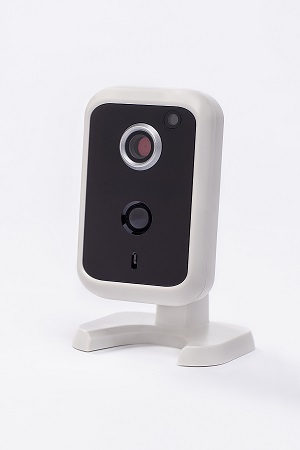
OVERVIEW
The Indoor Camera allows you to watch live video, record video when motion is detected, or record clips or snapshots if an event occurs in your home. After your device is setup, you can adjust the camera’s motion sensitivity and the zone it detects motion in using your camera settings. You can also set up custom alerts that take a photo or record video whenever a specific sensor is triggered. For example:
- Place your camera near a door and create an alert to record video whenever the door is opened from 3-5pm so you know your children arrived home safe and sound.
- Add an alert to notify you if anyone enters through the side door and take a photo so you can be sure that the dog walker arrived on time.
You can move the camera at any time within range of your Wi-Fi, so it does not need to be permanently installed in one location. This is an indoor only product and does require a power cord.
INSTALLING AN INDOOR CAMERA
Before you get started, make sure you have:
- Camera
- Ethernet cable (included)
- Power Adapter (included)
- Your Wi-Fi Network (SSID) and Wi-Fi password
Connect Ethernet cable from camera to your internet router.
Plug in AC power adapter into an outlet and connect the power cord to your Camera.
CONNECTING CAMERA TO YOUR WIRELESS NETWORK
Using your Touchpad (if included) or by logging into the web portal, iOS or Android application, go to Settings (the top right gear on apps) > Devices > and select your Camera name.
- Select Wi-Fi Settings and Enter your wireless information:
- Tap on Search for Network and select your Wi-Fi or wireless network (SSID)
- Type in your wireless password
- Select Security (Encryption) Type
- Tap on Submit
- After Wi-Fi network has successfully saved, remove the power cord and Ethernet cable from your camera.
- Reconnect just the power cord to the camera.
We recommend that you test your camera’s connection to Wi-Fi by watching a live video or taking a snapshot while the camera is next to the router before moving it to its final location.
After a few moments, tap on Settings > Devices > Camera Name, and it will display now with a Wi-Fi icon next to the camera name once connected to Wi-Fi
If you have more than one Indoor Camera, you can repeat the steps above to set up each one.
TIP: You must know your Wi-Fi or wireless network (SSID) name, Security Type (WPA/WPA2, WEP or None) and your Wireless Password to complete this process. Your camera must be on the same wireless network and router as your Base for proper set up.
To view camera snapshots, recorded video or live video, return to the Dashboard.
CONFIGURING ADVANCED CAMERA MOTION DETECTION
Our Indoor Security Cameras can provide you with the benefit of Advanced Motion Detection based on a motion zone you set, along with sensitivity settings you choose. When motion is detected, the camera will then record that event for 30 seconds so you can see what caused the event.
To customize your Camera Motion Settings:
- Go to Settings > Devices > Select Camera Name > Motion Settings
You have the option to customize by:
- Sensitivity
- Time Frame - by day of the week and by hour
- Arm State
- Notified via email or text alert
These settings are easy to customize. Try them out and tailor your camera to fit your unique lifestyle.


